10 Ways To Insulate Your Water Tank
Insulating your water tank is a game-changer, and there are several ways to do it! Start with fibreglass insulation blankets for an easy fit, or use reflective materials if you're in a hot area. Spray foam's quick application offers great coverage, while rigid foam board is durable and efficient. Don't forget radiant barriers; they reflect heat like a pro! Clean the tank well, and secure everything tightly. Regular inspections keep gaps at bay, helping you save energy. With all these tips, your tank's efficiency will soar, and you'll discover even more tricks to enhance insulation that'll make your energy bills smile!
Key Takeaways
- Use fibreglass insulation blankets to effectively reduce heat loss in cold climates and ensure cost-efficiency.
- Apply reflective insulation materials to minimise heat gain in hot climates and maintain consistent water temperature.
- Consider spray foam insulation for a durable and quick application that enhances energy efficiency.
- Install rigid foam board insulation for high R-values and easy cutting to fit around the tank.
- Incorporate a radiant barrier to reduce radiant heat transfer, particularly effective in hot climates.
Choose Fiberglass Insulation Blankets
When it comes to insulating your water tank, fibreglass insulation blankets stand out as an excellent choice. These blankets can reduce heat loss by up to 75% in cold climates, making them a smart, energy-efficient option. Not only are they cost-effective, but they're also incredibly easy to install. You'll find them available in various thicknesses and sizes, so you can pick the perfect fit for your tank.
To install, just wrap the blanket snugly around your tank and secure it with straps or tape. Make sure it covers the entire surface, and if needed, you can cut it to size. Just remember to follow the manufacturer's instructions for the best results!
While installing, don't forget your protective gear. You wouldn't want to inhale any fibreglass particles, right? Also, steer clear of open flames and keep moisture at bay.
Regular inspections will help too—check every 6-12 months for wear and tear. If you see damage, it's time for a replacement. With these blankets, you'll keep your water hot and your energy bills low, all while enjoying the satisfaction of a job well done!
Utilize Reflective Insulation Materials
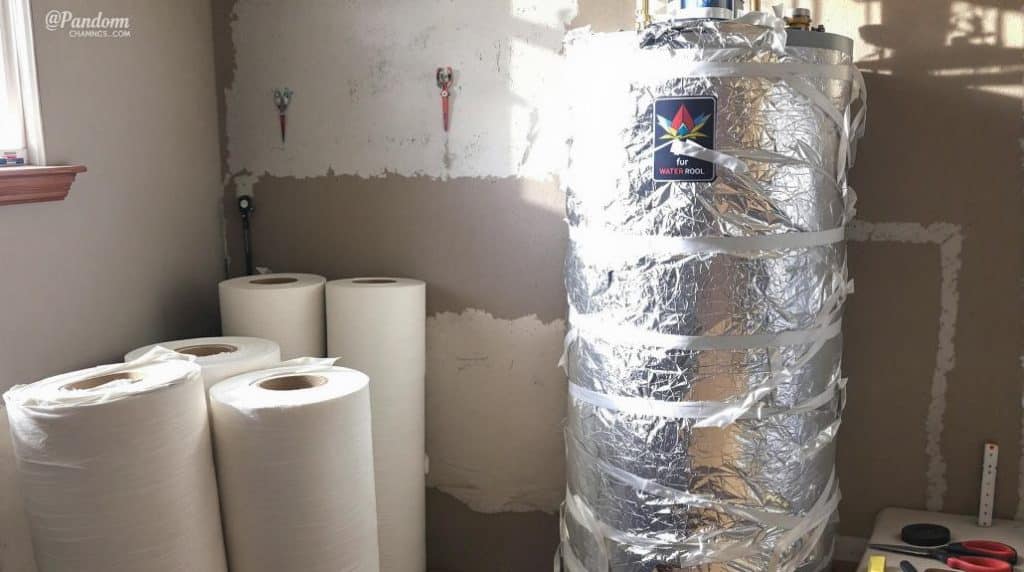
Reflective insulation materials offer an effective solution for keeping your water tank cool in hot climates. These materials, often made of aluminium foil layers combined with air bubbles or foam cores, can work wonders in reducing heat gain.
If you live in a sunny area, you'll appreciate how these products reflect sunlight, keeping your tank cooler.
Installing reflective insulation is a breeze. You won't need a PhD in engineering to get it right! Just remember to leave some air gaps to maximise effectiveness.
You can choose from various types, like aluminium foil insulation or reflective bubble insulation, depending on your needs.
One of the best parts? They're lightweight and easy to handle. Imagine wrapping your tank like a cosy blanket, but for summer!
Plus, they can lead to impressive energy savings by maintaining a consistent temperature in your water tank.
However, keep in mind that while they're great in hot climates, they mightn't be ideal for colder environments.
Apply Spray Foam Insulation
Spray foam insulation is a powerful method for enhancing the efficiency of your water tank.
It's not just about keeping the water warm; it's also about saving you money in the long run. Before you start, make sure to clean the tank thoroughly. You don't want any dirt or grease messing with the adhesion of the foam! Aim for a thickness of around 75-100mm for outdoor tanks, and don't forget that weatherproof coating afterwards.
Here's why spray foam insulation rocks:
- Energy efficiency: It can lower your heating and cooling costs considerably.
- Temperature control: Keeps your water from freezing or overheating.
- Durability: Forms a long-lasting barrier against the elements.
- Quick curing: The foam sets in seconds, making the process speedy.
- Professional finish: It often requires expert help for the best results.
Applying spray foam might sound complicated, but when done right, it offers a snug, weather-tight seal.
Install Rigid Foam Board
After ensuring your water tank is properly insulated with spray foam, consider another excellent option: rigid foam board insulation. This stuff is fantastic! Made from materials like polystyrene and polyisocyanurate, rigid foam boards deliver high R-values, giving you great insulation that keeps your water at the perfect temperature.
You'll find it comes in large panels, making it easy to cut and fit around your tank. Plus, it's super durable, so you won't have to worry about it breaking down over time. Just think about it: less heat loss means lower energy bills!
To get started, measure your tank, cut the foam board to size, and wrap it around snugly, securing it with tape. It's a simple process that almost anyone can do, even if you're not a DIY expert.
With options like Expanded Polystyrene (EPS) or Extruded Polystyrene (XPS), you can choose what best fits your needs. Just remember, proper installation is key to ensuring maximum efficiency.
Use Radiant Barrier Insulation
When you're looking to boost your water tank's insulation, consider using radiant barrier insulation. This clever solution reflects heat instead of absorbing it, which can really help you save on energy bills, especially in warmer climates.
You'll find several types of materials to choose from, such as aluminium foil, aluminium-coated plastic films, and foil-faced insulation. Just remember, radiant barriers work best when installed facing an open air space, so keep that in mind!
Here are some perks of using radiant barrier insulation:
- Reduces radiant heat transfer by reflecting heat away.
- Can lower cooling costs by 5% to 10%, which is great for your wallet!
- Works wonders in hot climates, particularly with air ducts in the attic.
- Pairs well with other insulation to enhance overall effectiveness.
- Durable options are available, making installation a breeze.
Measure Tank Accurately
Accurate measurements are essential for effective insulation of your water tank. You want to make certain you get it right, so grab a flexible tape measure—it's perfect for those curves and irregular shapes.
If your tank is rectangular, measure the height, length, and width, and don't forget to record these in a consistent unit, whether inches or centimetres.
Taking multiple measurements is a smart move; it helps guarantee accuracy. If you're dealing with hard-to-reach spots, consider using a laser measure. It can make your life a lot easier!
Also, keep an eye out for any obstructions or protrusions on the tank.
Oh, and don't forget about the tank's lid or cover—measure that separately too. If you spot any irregularities or damage, note those down, as they might affect how well your insulation works.
Lastly, always prioritise safety! Wear gloves and safety glasses, and make sure you're stable while measuring. There's no need to stretch too far—use a ladder or a step stool if needed.
Taking these steps will set you up for insulation success!
Clean Tank Surface Thoroughly
A clean tank surface is vital for effective insulation. You wouldn't want to put a cosy sweater on a dirty shirt, right? Similarly, your water tank needs a spotless surface for insulation to stick.
Start by removing any old coatings and debris—this step is important. Use a wire brush or scrubber to make the tank shine. If you find rust, don't panic; a special rust converter can handle that.
Here are some handy tips to keep in mind:
- Use mild detergent and water for regular cleaning.
- Trisodium phosphate works wonders on tough grime.
- Consider eco-friendly options like vinegar and baking soda.
- Always wear protective gloves and eyewear for safety.
- Confirm the tank is dry before applying insulation.
After cleaning, inspect the surface for any leftover debris and verify it's smooth and even.
This preparation might seem like a chore, but it's the key to long-lasting insulation. So, roll up your sleeves and get to work; your future self will thank you when your water stays warm and cosy!
Secure Insulation Properly
With your water tank clean and ready, it's time to fasten the insulation properly. This step is essential for keeping your water temperature steady and preventing energy loss. First, verify that the insulation material fits snugly around the tank—gaps can lead to unwanted heat loss. Use recommended fasteners or adhesives to keep everything in place, following the manufacturer's instructions. Overlapping insulation sheets is a smart move, as it helps avoid cold spots.
Here's a quick reference table to help you remember key points:
| Step | Tips | Why It Matters |
|---|---|---|
| Fit snugly | Measure carefully before cutting | Minimises gaps and energy loss |
| Use fasteners | Choose recommended types | Guarantees materials stay in place |
| Overlap sheets | Layer them for full coverage | Prevents cold spots and drafts |
| Ventilation | Allow air circulation | Prevents moisture buildup and damage |
And don't forget to wear protective gear! Insulation materials can be itchy, and the last thing you want is to be scratching during your insulation project. Secure it right, and you'll enjoy a cosy water tank for years to come!
Inspect for Gaps Regularly
Regularly inspecting your water tank for gaps is essential, as even small openings can lead to significant energy loss. You wouldn't want your heated water escaping, right?
These gaps can hike up your energy bills by up to 20% and make your water heater work harder, shortening its lifespan. So, keep an eye out, especially around where pipes connect to the tank and at its base.
To make your inspections easier, consider these tips:
- Conduct visual inspections every 6-12 months, or more often if you use more hot water.
- Look for gaps during your routine maintenance checks—think of it as a little spa day for your tank!
- Use a smoke test or thermal imaging to catch those sneaky gaps.
- Remember, seasonal changes can create new gaps, so adjust your inspection schedule accordingly.
- Don't forget to seal any gaps you find with materials like foam tape or caulk.
Taking the time to inspect for gaps not only saves you money but also keeps your water heater in tip-top shape. Now, that's a win-win!
Maintain Insulation Over Time
Maintaining insulation over time is essential for ensuring your water tank operates efficiently. Just like a cosy sweater, your water tank's insulation needs a little TLC. Over the years, it can lose its effectiveness, so keep an eye on it! Here's a quick guide to help you maintain that insulation:
| Action | Why It Matters | How to Do It |
|---|---|---|
| Replace Insulation When Necessary | Insulation loses 2-5% effectiveness yearly. | Check every 10-15 years. |
| Protect Insulation from Elements | UV rays and moisture can cause damage. | Use waterproof covers. |
| Maintain Insulation Thickness | Thicker insulation saves more energy. | Aim for at least 5 centimetres thick. |
| Prevent Insulation Compression | Compression can cut effectiveness by 50%. | Avoid tight wraps, allow airflow. |
Conclusion
So there you have it—insulating your water tank is easier than you might think! By choosing the right materials and keeping a close eye on your insulation, you can save energy and keep your water nice and hot. Plus, who doesn't love saving a little cash on their energy bill? So grab that spray foam or fibreglass blanket, and let's get insulating! Your future self (and your wallet) will thank you!