Maximize Your Hive Heating System: Complete Setup Guide
To maximise your Hive heating system, start with a smooth hub installation—just connect it to the power and your router. Next, position the receiver near your boiler, away from big metal objects to avoid interference. Don't forget to power up the thermostat with some AA batteries and link it to your Hive Hub through the app—it's super intuitive! Schedule heating to match your routine and utilise the energy-saving features for better bills. When things don't go as planned, troubleshooting is a breeze. Stick around, and you'll uncover even more handy tips to optimise your setup!
Key Takeaways
- Ensure proper installation by following the hub, receiver, and thermostat setup steps for optimal communication and efficiency.
- Utilise the Hive app for easy online configuration, allowing remote access to heating schedules and temperature adjustments.
- Set personalised weekly schedules with up to six time slots to maximise comfort while minimising energy usage.
- Take advantage of energy-saving features like geolocation, holiday mode, and frost protection to reduce bills and protect your system.
- Regularly monitor real-time data and receive notifications to promptly address any performance issues and optimise heating patterns.
Hub Installation Steps
When you're ready to set up the Hive heating system, the first step is installing the hub. Start by connecting the hub to a mains power socket using the provided power cable.
Next, grab an Ethernet cable and connect the hub to your broadband router—this step's essential for getting everything online.
Once connected, you'll see a series of light signals on the hub. Wait for that spinning blue light to appear; it's like the hub's way of saying, "I'm waking up!"
After this, press the button at the back of the hub for about a second. This puts it into pairing mode, and you should see the status light flash amber, indicating it's ready to connect.
Now, if you notice a solid amber light, don't panic! Just restart the hub, receiver, and boiler, and keep your fingers crossed for that flashing amber again.
Receiver Installation Guide
To install the receiver for your Hive heating system, position it close to your boiler or central heating system for ideal performance. This guarantees efficient communication and operation.
Here's what you need to keep in mind:
- Distance Matters: Keep the receiver at least 30cm away from large metal objects to avoid interference.
- Labelling: If you're using a Multizone setup, label your receivers to indicate which zone they control. Trust me, it'll save you headaches later!
- Accessibility: Choose a location that's convenient and easy to access. You don't want to be crawling around every time you need to check something.
- Cable Awareness: Be cautious of any buried cables or pipes when installing. It's best to avoid any surprises!
Once you've got it in place, follow Hive's wiring diagrams and guarantee everything complies with BS7671 regulations.
If you're feeling a bit intimidated, don't worry; just take it step by step!
After wiring, remove the backplate, secure it to the wall, and test it by pressing the central heating button. If you see that green light, you're on the right track!
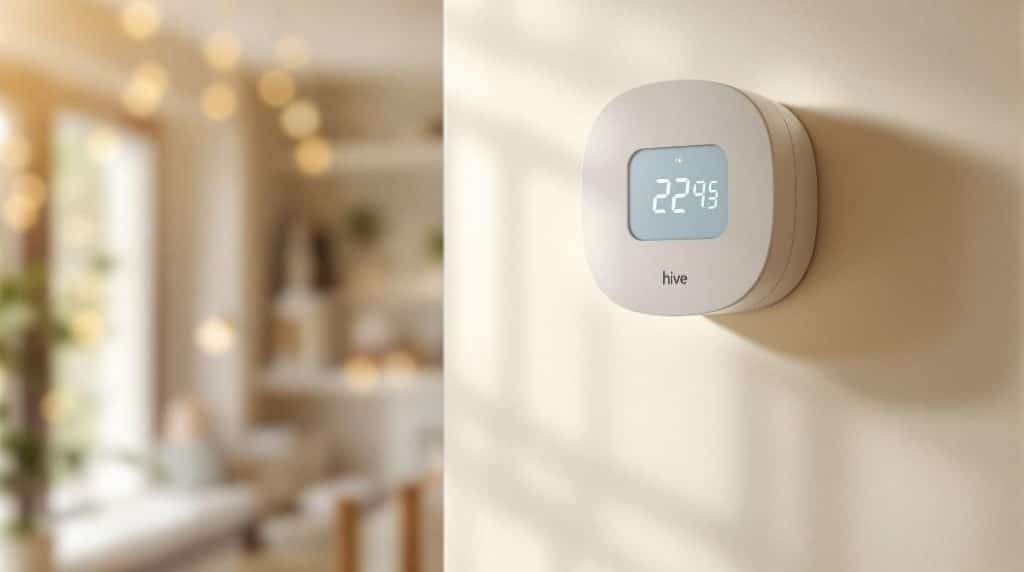
Thermostat Installation Process
After successfully installing the receiver, you're ready to tackle the thermostat installation process. First, connect the Hive Hub to your broadband router using an Ethernet cable and plug it into a power source. Wait for it to flash amber—this means it's ready to go!
Next, add your thermostat. You'll want it to show 'Search' and connect with the hub and receiver.
Insert four AA batteries into the thermostat, and it'll start searching for the hub and receiver. Keep an eye on that display; when it stops showing 'Search', you've successfully paired the devices!
Now, let's talk connections. Confirm the receiver is powered up and flashing amber. If you've got a dual-channel receiver for unvented heating systems, follow safety precautions closely.
Once you've wired the receiver to your heating system, test it by pressing the central heating button—if the boiler fires up, you're on the right track!
Finally, use the Hive app or a web browser to complete the setup. With everything in place, you'll be controlling your heating with ease! Happy heating!
Online Configuration Instructions
While setting up your Hive heating system online, you'll begin by creating or logging into your Hive account. This is your gateway to managing your heating like a pro!
Here's a quick rundown of what you'll need to do:
- Download the Hive app or visit hivehome.com to get started.
- Register with your email and password, or log in if you're already a member.
- Enter your hub ID (don't worry, it's on the underside of your hub) when prompted.
- Complete the online setup to link your thermostat to the Hive account.
Once your account is set up, power on your hub and wait for it to connect. If you see a solid green light, you're in business!
The dashboard at hivehome.com will let you control your heating, edit schedules, and track temperature history—all from the comfort of your couch.
So, whether you're dreaming of a cosy evening or just trying to save energy, you've got the tools to make it happen!
Now, let's get your system running smoothly. Happy configuring!
Multizone Installation Methods
As you commence on the journey of setting up your Hive Multizone system, it's essential to understand the various installation methods available. First things first, you'll need a few essentials: a working gas central heating system, a broadband connection, and either an Android or Apple smartphone. Got those? Great!
Start by installing your hub—it'll flash amber when it's ready. Next, you'll install the receivers, which will double flash amber before they pair. Don't forget to add batteries to your thermostats; a solid green light on the receiver means you're in business! If you're adding more zones, just repeat the receiver and thermostat pairing process.
Now, let's talk wiring. Make sure to isolate the system safely before diving in. You'll need to link the brown core from the additional zones' two-port valve to the programmer heating connection.
If the existing thermostat's wiring looks like a bowl of spaghetti, it's time for a clean-up!
While it might seem a bit complex, taking it step-by-step will help you enjoy the benefits of zoned heating control, saving you both energy and money in the long run. Happy installing!
Troubleshooting Common Issues
When you encounter issues with your Hive heating system, it's important to tackle them methodically to restore functionality.
After all, a cosy home is a happy home! Here are some quick troubleshooting tips to get you back on track:
- Check your internet connection: Confirm the Hive hub is connected to your broadband router. A loose cable could be the culprit!
- Restart the hub: Sometimes, all it takes is a good old power cycle to reset its connection and clear any hiccups.
- Inspect the receiver status light: This little light indicates if your receiver is connecting to your Hive devices. If it's off, there's a problem!
- Re-pair devices: If all else fails, follow the specific model procedures to re-establish connectivity.
Don't forget to check the thermostat's positioning. If it's near a heat source, you might get inaccurate readings.
And if your battery's low, that could mess things up too. A little troubleshooting goes a long way to keeping your Hive system running smoothly, so roll up your sleeves and jump in!
Energy Saving Tips
Keeping your Hive heating system running smoothly is just the start; you can also enhance its efficiency and save energy.
First, don't skip that annual boiler service. Regular check-ups not only keep things efficient but also catch little issues before they become pricey repairs. Think of it as a health check for your heating system—better safe than sorry!
For maximum performance, have a Gas Safe engineer inspect your boiler's gas pressure and flue gases annually to ensure optimal efficiency.
Next, consider lowering your thermostat by just one degree. It mightn't feel like much, but that tiny change can lead to noticeable savings.
Also, why heat rooms you're not using? Only turn on the heat in the spaces you occupy. You'll be amazed at how much that helps your energy bill.
To prevent heat from sneaking out, use draught excluders and keep windows and doors shut when it's chilly.
And here's a fun tip: after baking, leave the oven door open to let that warmth spread through your home.
Smart Thermostat Programming
How can you make the most of your Hive heating system? One of the best ways is through smart thermostat programming. With the Hive app, you can easily set schedules that match your lifestyle and keep your home cosy without wasting energy.
Four things you can do:
- Set Up to Six Time Slots: Adjust the heating throughout the day to suit your routine.
- Personalised Weekly Schedules: Tailor different temperatures for different days—maybe cooler on weekdays and warmer on weekends!
- Use Manual Mode: Need an immediate temperature boost? Just switch to manual mode for instant comfort.
- Zone Control: Heat only the areas you use with customisable settings for each room.
The Hive app makes it simple to set these up, so you can enjoy a warm home without lifting a finger.
Plus, you can adjust schedules on the go—perfect for those surprise late-night movie marathons!
With these features, you'll not only stay comfy but also save on energy bills.
Energy usage reports through your Hive system provide valuable insights to help you make smarter heating decisions.
Monitoring and Adjusting Settings
To get the most out of your Hive heating system, monitoring and adjusting settings is essential for maintaining comfort and efficiency. You can keep an eye on real-time data like temperature, humidity, and energy usage right from your phone.
Imagine walking in from the cold to a perfectly cosy home—just a few taps in the Hive app can make that happen!
You can adjust the temperature remotely, set schedules, and even use geolocation features that automatically adjust heating based on where you are. If you're running late, the boost function lets you crank up the heat for a short time—perfect for those chilly evenings.
Plus, when you head off on vacation, activating holiday mode can save energy without sacrificing comfort.
Don't forget about the frost protection feature, which kicks in when temperatures drop below 7 degrees Celsius, keeping your pipes safe from freezing.
With all these tools, you can enjoy a warm home while also being energy-efficient. So, go ahead, embrace the tech, and let your Hive heating system work its magic!
Conclusion
Now that you've got the lowdown on setting up your hive heating system, you're all set to enjoy a cosy home! Remember, with the right installation and smart programming, you can keep your space warm without breaking the bank. Don't forget to troubleshoot any hiccups along the way—it's all part of the process. So go ahead, get everything configured just right, and bask in the warmth of your smart choices. Happy heating!
Thinking about upgrading? I do smart thermostat installation in Dartford and Gravesend — usually fitted in a couple of hours.